How to Use Consulgent
Set Up the Project
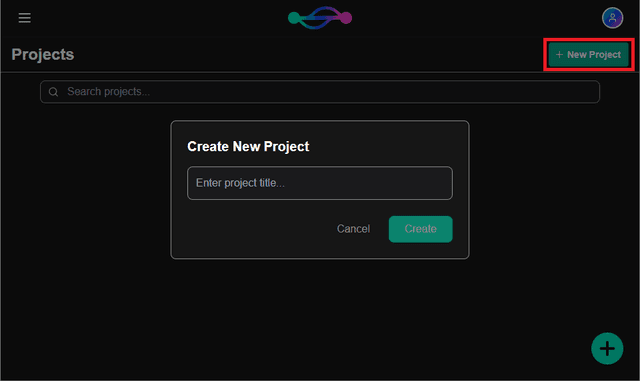
Create the Project
- Navigate to the Project page (click Project in the sidebar)
- Click the + New Project button and enter a project name
- You will be redirected to the onboarding page for the new project
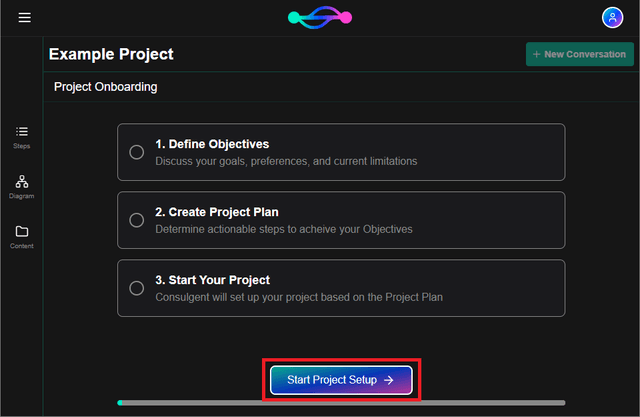
Kick-off Onboarding
- Start the onboarding process by clicking Start Project Setup
- In the popup, provide a description of what you want to accomplish with this project, and click Get Started to start the Objectives setting process
Note: If you decide to leave and return to the onboarding process, you will automatically be returned to this page, where you can see your progress, and rejoin where you left off.
Outline Objectives
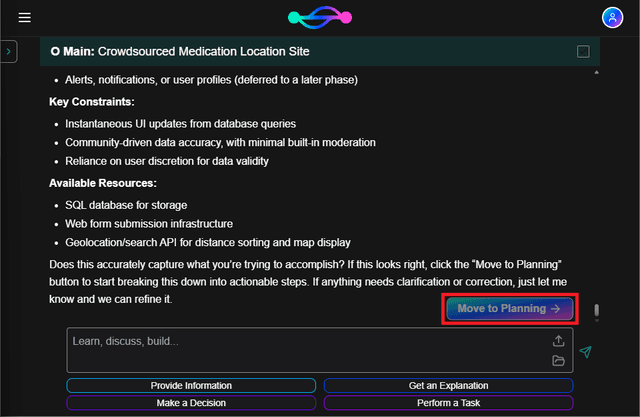
- Have a conversation with the Consulgent AI about what you want to accomplish with this project
- Once the AI believes it has a good understanding of your objectives, it will provide a summary and you will see a Move to Planning button appear
- If you think the AI missed something, simply continue the discussion, calling out any changes you want to make
- Once you are satisfied with the Objectives summary, click the Move to Planning button to proceed to planning out project steps
Plan Project Steps
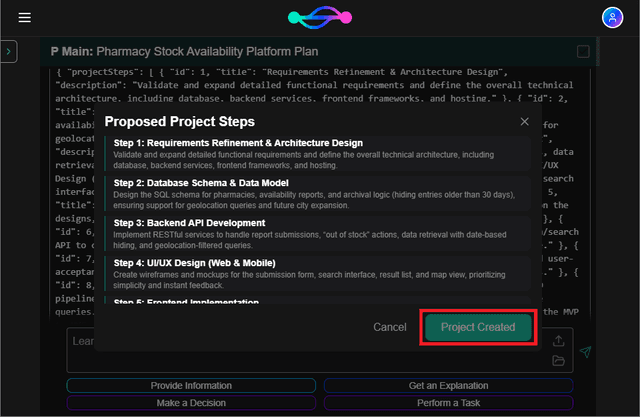
- Consulgent will bring in the Objectives summary and prompt the AI to create a project plan, which will propose a set of steps for you to discuss
- Once ready, let the Consulgent AI know, and it will generate a detailed Proposed Project Steps confirmation window for you to review
- Like with the Objectives, you can close the popup and ask for changes (reopen by clicking the Show Project Steps button)
- Once you are satisfied with the steps, click the Create Project button in the popup, and Consulgent will automatically create a conversation for each step
Note: We are aware of an issue where the Consulgent AI will only return the corrected section(s) of the Objectives summary or Proposed Project Steps if revised, thus not regenerating the "Move to Planning" or "Show Project Steps" buttons. If this occurs, simply ask the AI to regenerate the full summary or steps.
The Project Dashboard
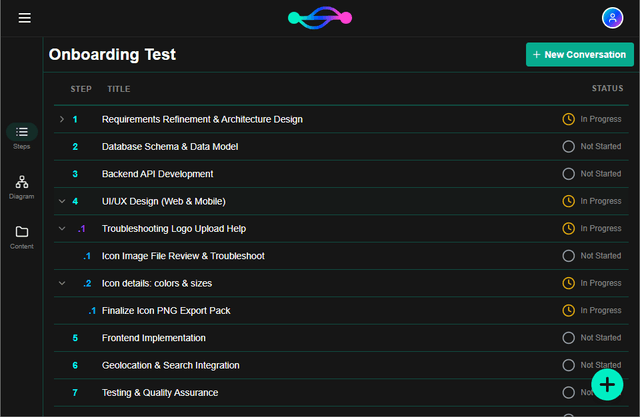
Project Steps
- The Steps tab lists each conversation in the project, ordered chronologically and by hierarchy
- Clicking one redirects you to that conversation
- Each list has the conversation's step indicator within the project, its title, and its progress status (Not Started, In Progress, or Completed)
- The highest level conversations match the Project Steps from onboarding
- Click the dropdown icons to reveal a conversation's "branch" conversations, if any have been created from within that conversation
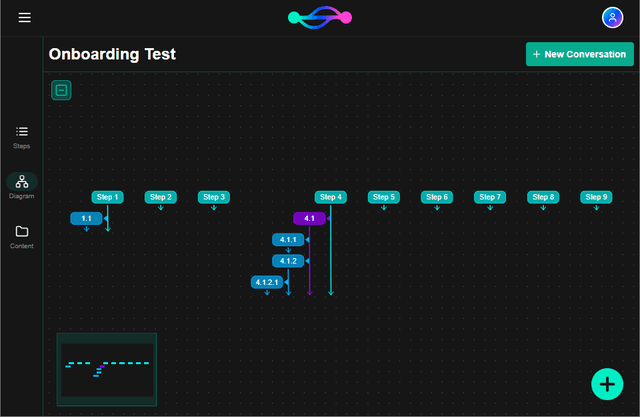
Project Diagram
- The Diagram tab shows the project's conversations visually, also ordered chronologically and by hierarchy
- Clicking one redirects you to that conversation
- The top left button changes the amount of detail shown for each conversation's bubble
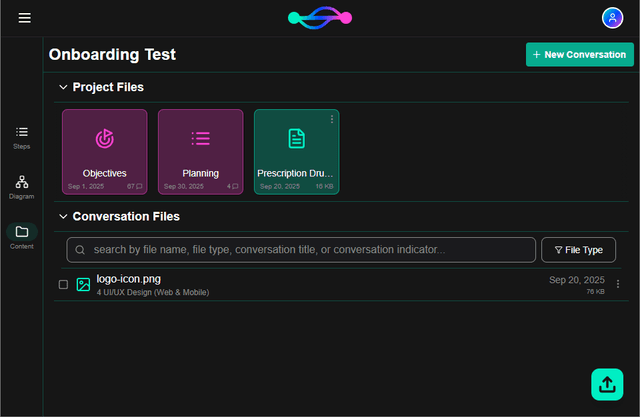
Project Content
- The Content tab shows the files uploaded to the project, plus links to the Objectives and Planning conversations from onboarding
- The Project Files are files that are uploaded to this page (via the bottom right upload button), and are available to any conversation in the project
- The Conversation Files are files that are uploaded from within a conversation in the project, and are only available to that conversation and its "branch" conversations
Working in a Conversation
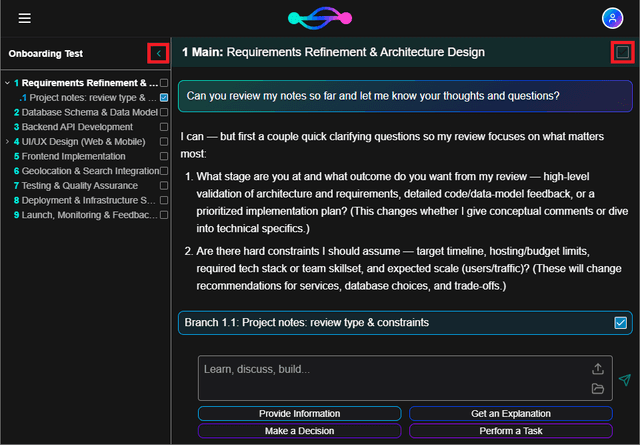
Conversation Basics
- Work through steps in your project by having conversations with the Consulgent AI - you'll find it's a lot more inquisitive and conversational than your typical chatbot
- In the main conversation for a project step (or other newly created conversation), you should focus on identifying and tracking progress of sub-tasks
- For more specific items (providing information to the AI, getting a topic explained, getting help with a decision, or performing a task), use a "branch" conversation

Branch Conversations
- Create a "branch" side conversation by clicking one of the buttons at the bottom of the page, based on what you want to discuss
- Consulgent will automatically redirect you to the branch conversation and bring over the latest info from the current conversation
- If you have a specific question or other information to provide when branching, enter it in the message box before clicking the branch button
- Back in the original conversation, a branch message will appear, which you can click at any time to revisit that branch conversation
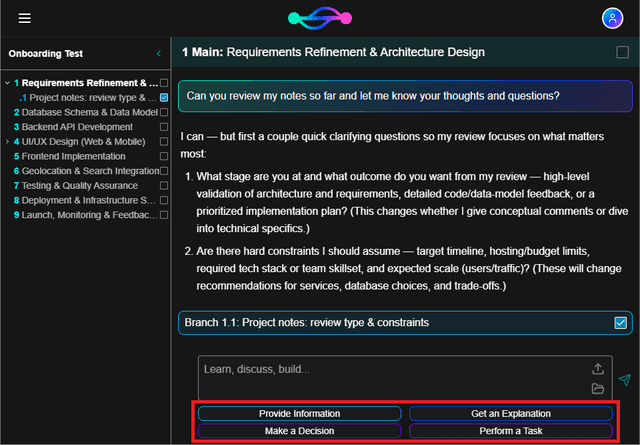
Branch Types
- Provide Information
Use this when you need to provide the AI with additional information, preferences, etc. that you think is relevant for the current task
This is useful when the AI may have incorrect assumptions, asks narrow questions, or is stuck on a line of questioning - Get an Explanation
Use this when you want the AI to provide further explanation about a topic or concept that may not directly progress the current task
This is useful when the AI introduces terms, scenarios, or instructions that you are unfamiliar with - Make a Decision
Use this when you want to have a discussion with the AI on the best next steps to take for the task, or want to understand the options available
This is useful when you want to explore different options, understand impacts of proposals, or are unsure of next steps - Perform a Task
Use this when you want the AI to assist you in executing a task, either directly (e.g. writing code) or indirectly (e.g. providing instructions)
This is useful once you have already decided on which steps to take and want assistance acting on that decision
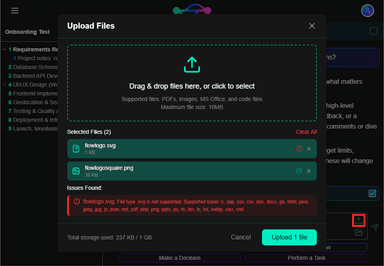
Adding Files
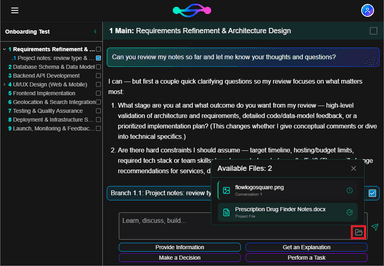
- Within existing conversations, you can both upload and view files with the icons at the right of the message box
- Before you upload files, the system will verify that the files are compatible with currently accepted file sizes and formats
- You can also check which files from the project are available for this conversation
- Not all available files will be referenced in each conversation
Additional Components
- The side panel shows where you are within the Project's chronology & hierarchy
- Click on any conversation title to go to that conversation or click on the project title at the top to return to the Project Dashboard
- The resolve checkbox at the top right helps identify conversations that are complete
- To accurately track progress, a conversation can only be resolved once all of its branch conversations have been resolved
Note: We are continually evolving how the Consulgent AI interacts throughout the project process. If your experience is annoying, confusing, unhelpful, or otherwise sub-optimal, please complain to us at consulgent.com/feedback!